
From Pantry to Food Cellar: A Practical Sensor Setup for Temperature and Humidity
Use simple temperature and humidity monitoring to verify which pantry, basement, cellar, and outbuilding spaces actually fit your stored crops before condition variability turns storage into loss.
Why this matters
A label on the room is not a storage plan. A pantry can stay too warm for potatoes. A basement corner can be dry enough for onions one week and too damp the next. A cellar bay that feels cold can still miss the humidity that carrots and cabbage need. Once those conditions drift, the crop pays for it in sprouting, shriveling, bitterness, rooting, or decay.1, 2, 3, 4
That is why a practical sensor setup matters. You are not trying to build a laboratory. You are trying to confirm which part of the building is actually fit for which crop, then catch drift before it turns stored food into avoidable loss, whether that crop came out of your own ground or off a farmer's truck at fall harvest.1, 2
What is going wrong
Most mixed home storage fails because the person storing the food is managing rooms by name instead of by measured conditions. Extension guidance is consistent on the underlying problem: storage life depends on both temperature and relative humidity, and common storage crops do not share one universal target.1, 2, 3, 4
The problem is usually not the lack of a room. It is the lack of a reliable reading where the crop actually sits. UMaine's storage bulletin is explicit that humidity should be monitored with a hygrometer or sling psychrometer rather than by produce appearance, and that a recording or max/min thermometer is useful for detecting fluctuation in the storage space.1 Nebraska Extension makes the same practical point for home storage: monitor temperatures closely, especially in outdoor or variable locations, and inspect stored produce throughout the winter for decay or regrowth.2
A useful way to think about it
Think of sensors as a way to verify each storage area, not as gadgets to scatter around the building.
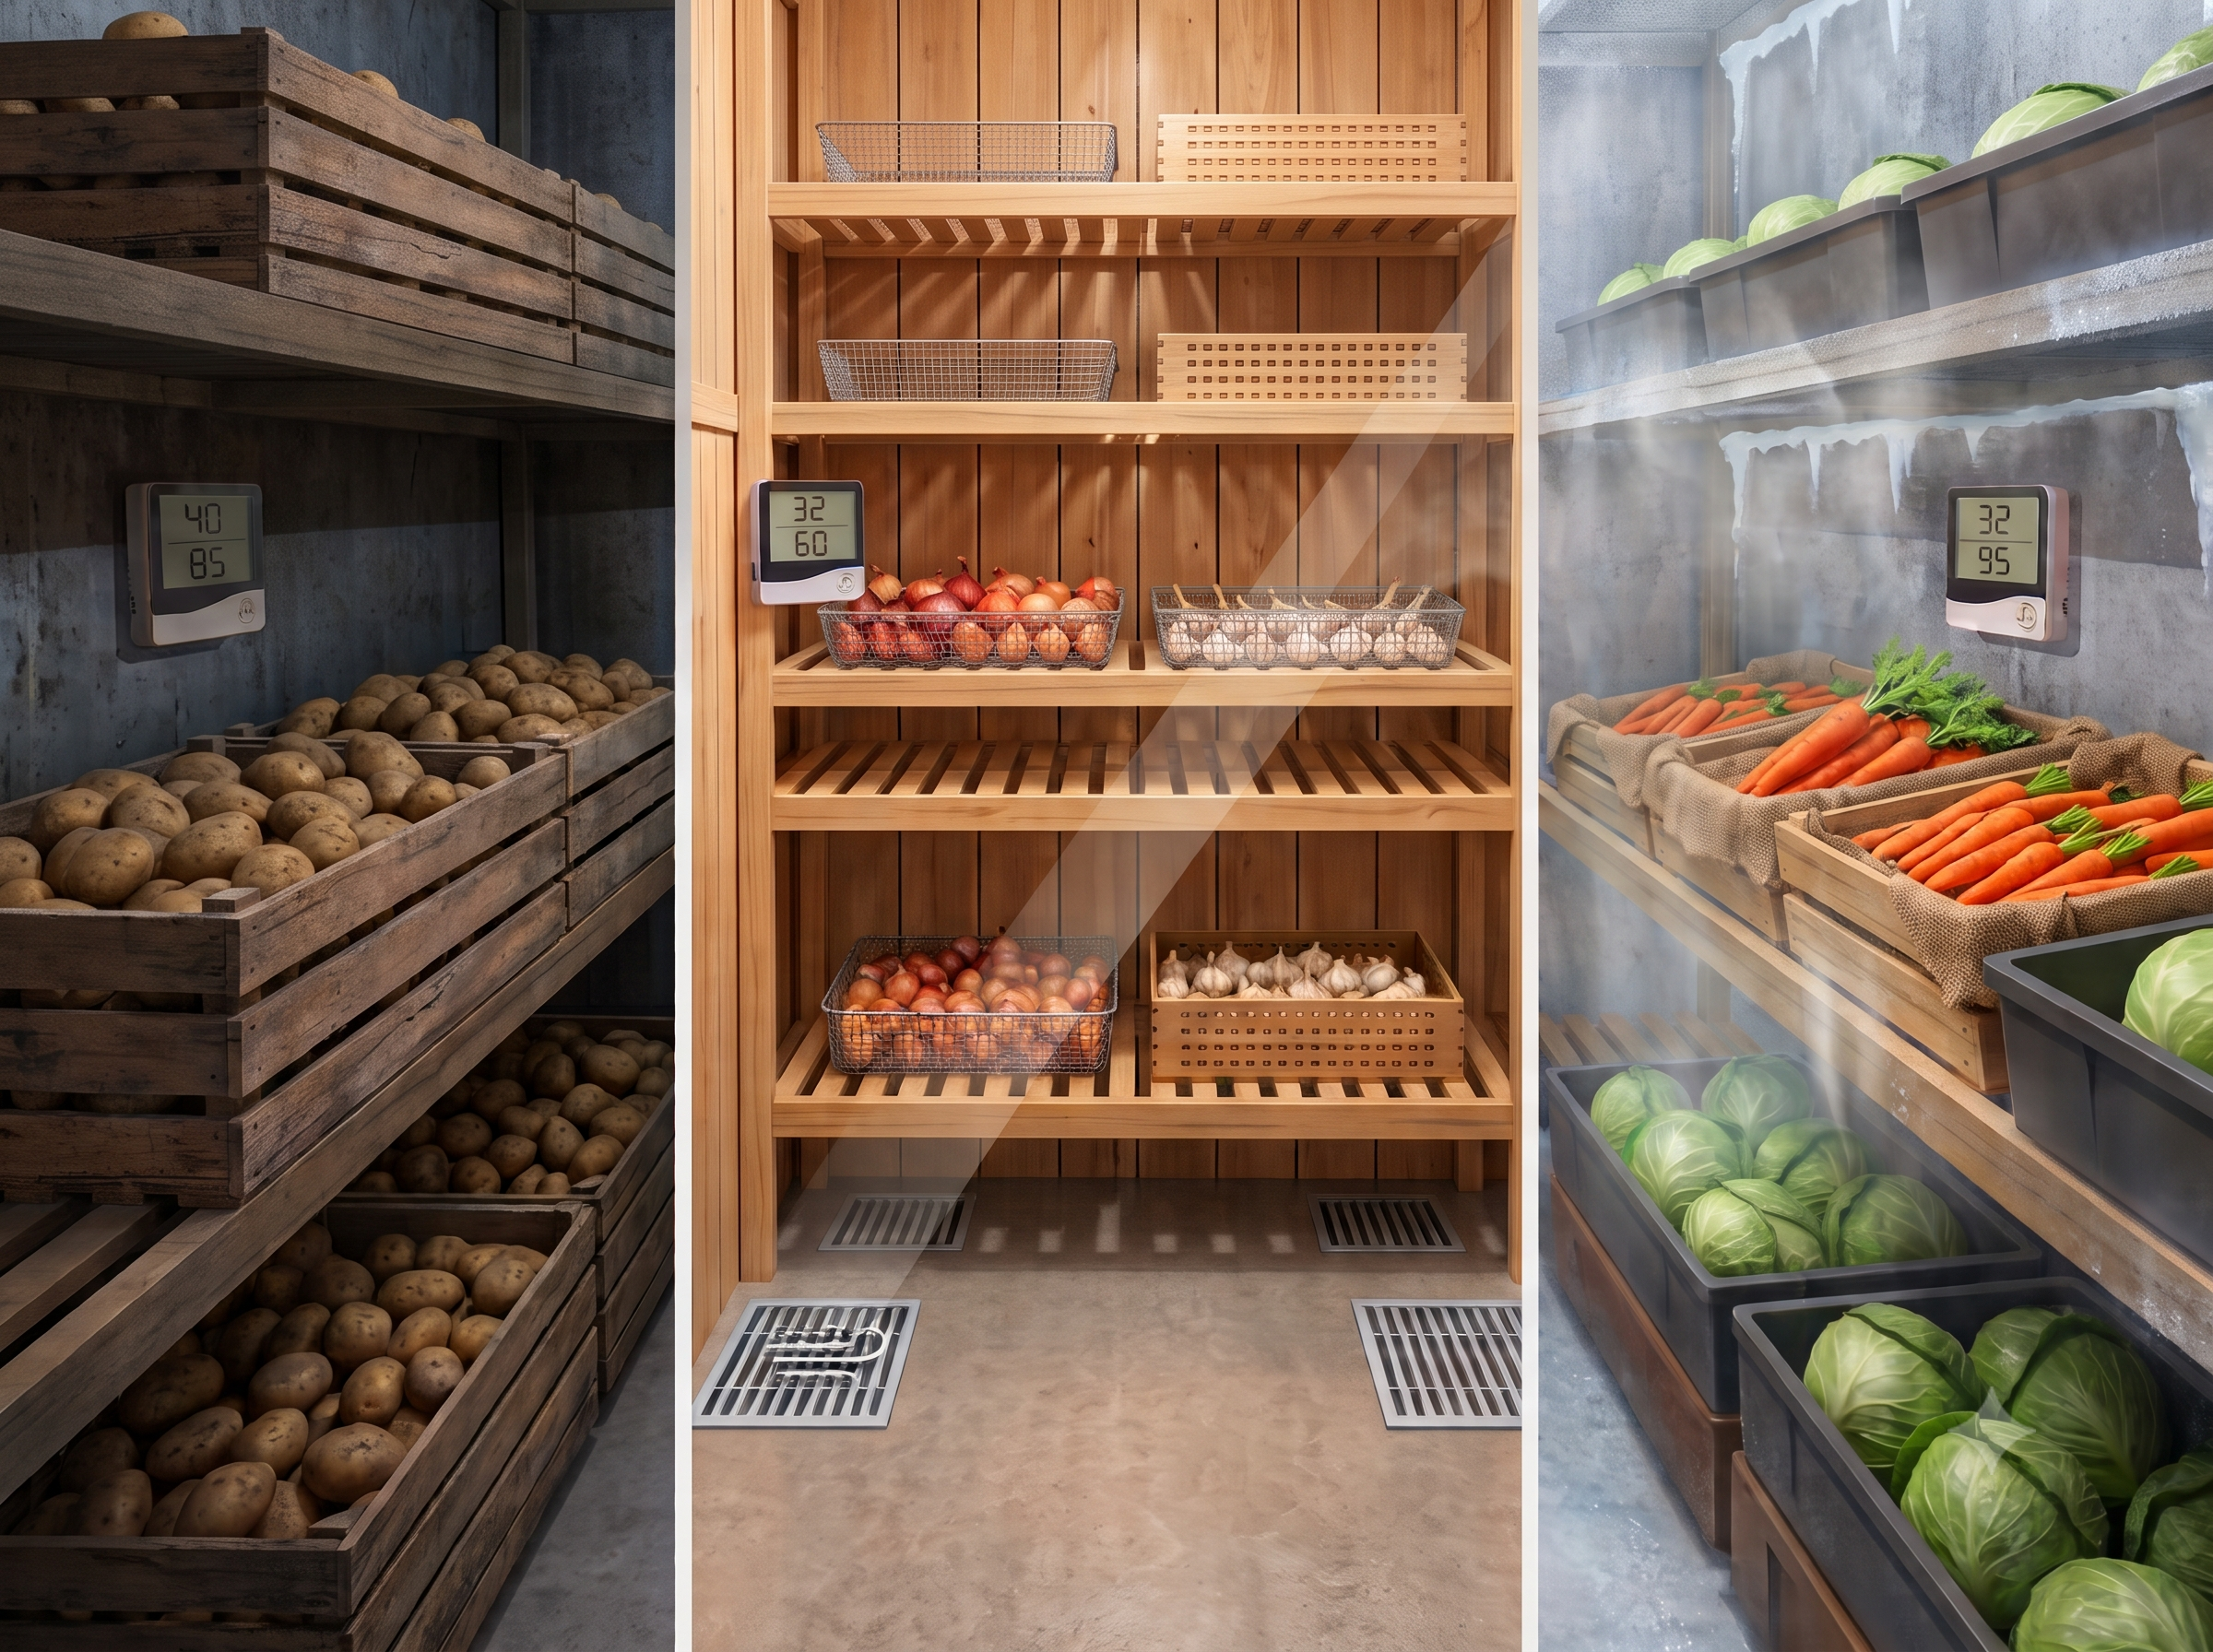
The research behind this guide points to three broad storage conditions, which is why one reading for the whole building is not enough:
- Cold, high-humidity vegetable storage: roughly 32 to 36 F with very high relative humidity for root crops, cabbage-family crops, and other vegetables meant for cold storage.1, 3, 4
- Cool potato storage: about 40 to 45 F with high relative humidity for potatoes meant for eating.2, 3
- Warmer storage: about 55 to 60 F for sweet potatoes, pumpkins, and winter squash, with lower humidity for crops such as cured onions and garlic that do not belong in a damp root cellar setup.1, 3, 4
Once you treat those as separate storage conditions, the sensor setup gets simpler. Every space you intend to manage as a different storage zone needs its own temperature and humidity reading. If one basement room holds both fruit and vegetables, UC Davis recommends separating those groups because ethylene-sensitive vegetables should not share air with fruit that can produce ethylene.4 In practice, that means mixed storage deserves more than one reading point if you are trying to protect different lots inside the same room.
What to do
- Start with crops, not rooms. List the crops you expect to hold for more than a few days and write down their target range before you place a sensor. That applies whether you grew the crop yourself or bought a bulk lot when local harvest came in. Potatoes, onions, carrots, cabbage, sweet potatoes, and winter squash do not ask for the same conditions, so your monitoring plan should not pretend they do.1, 2, 3
- Give each storage area its own reading point. If the pantry, basement shelf, cellar bay, insulated tote, or outbuilding are functionally different storage environments, each one needs its own temperature and humidity reading. A single hallway thermometer does not tell you what the crop is experiencing inside those separate zones.1, 4
- Measure where the crop lives. Put the sensor at the same height and in the same part of the zone as the stored lot rather than near a convenient doorway. The goal is to measure the crop's microclimate, not the temperature of the room you walk through. This matters most in spaces with fluctuating temperatures, variable ventilation, or storage containers that hold moisture differently than the room around them.1, 2
- Use the readings to make placement decisions. If one area stays closer to the crop's target and another keeps missing it, move the crop or redefine the zone. Storage guidance is only useful when the real room can hold it. If the warm side of the basement behaves like squash storage and the cold side behaves like a root-cellar space, treat them as two zones and label them that way.1, 4
- Respond to humidity mismatch with the room, not wishful thinking. Nebraska and UMaine both note that humidity can be raised with damp packing media or a humidifier, while dry-storage crops need a drier, well-ventilated space.1, 2 If onions and garlic keep seeing wet-room conditions, move them. If root crops are drying out, raise humidity around that zone instead of blaming the crop.
- Keep manual inspection in the routine. Sensors tell you what the air is doing, not whether a box of potatoes is greening or a crate of onions has started to rot. Check stored produce regularly and remove decaying lots immediately so one bad section does not shorten the life of the rest of the inventory.2
Evidence behind this guide
The practical setup in this guide comes from two layers of evidence. First, UMaine, Nebraska, and UMass show that common storage crops need different temperature and relative-humidity ranges, which means the person storing the food must verify real room conditions instead of assuming every cool space is interchangeable.1, 2, 3 Second, UMaine and UC Davis translate those crop requirements into monitoring logic: use instruments to track humidity and temperature, watch for fluctuation, and split storage zones when crops require different climates or different ethylene exposure.1, 4
Field rule
Put one temperature-humidity reading point in every storage zone you intend to manage, then assign crops to the zone that actually holds their target range rather than the room name you hoped would fit.
Sources
- 1web-university-extension: https://extension.umaine.edu/publications/4135e/
- 2web-university-extension: https://extensionpubs.unl.edu/publication/g1264/na/html/view
- 3web-university-extension: https://www.umass.edu/agriculture-food-environment/vegetable/fact-sheets/optimal-storage-conditions-ethylene-sensitivity-of-fall-storage-crops
- 4web-university-research: https://postharvest.ucdavis.edu/compatibility-chart-short-term-transport-or-storage
Need help?
Ask support if you have any questions about food storage.